
Vehicle and trailer inspections
- Log in to ICO with your email and password.
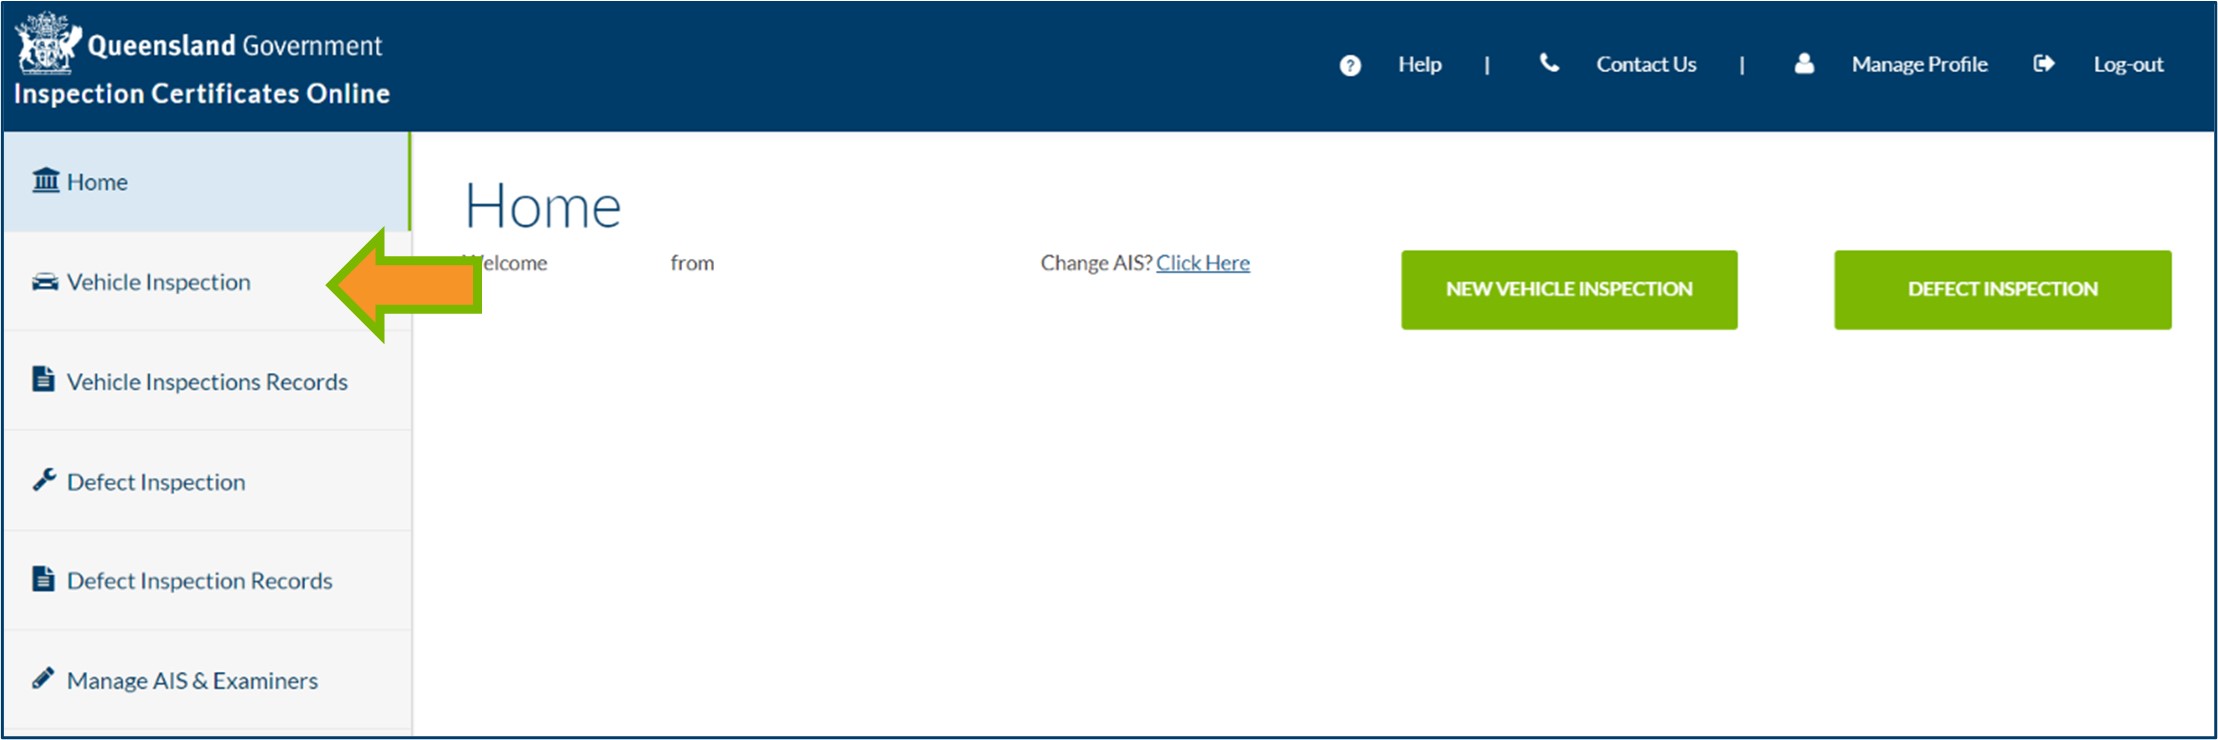
- Click Vehicle Inspection from the main menu of the Home screen.
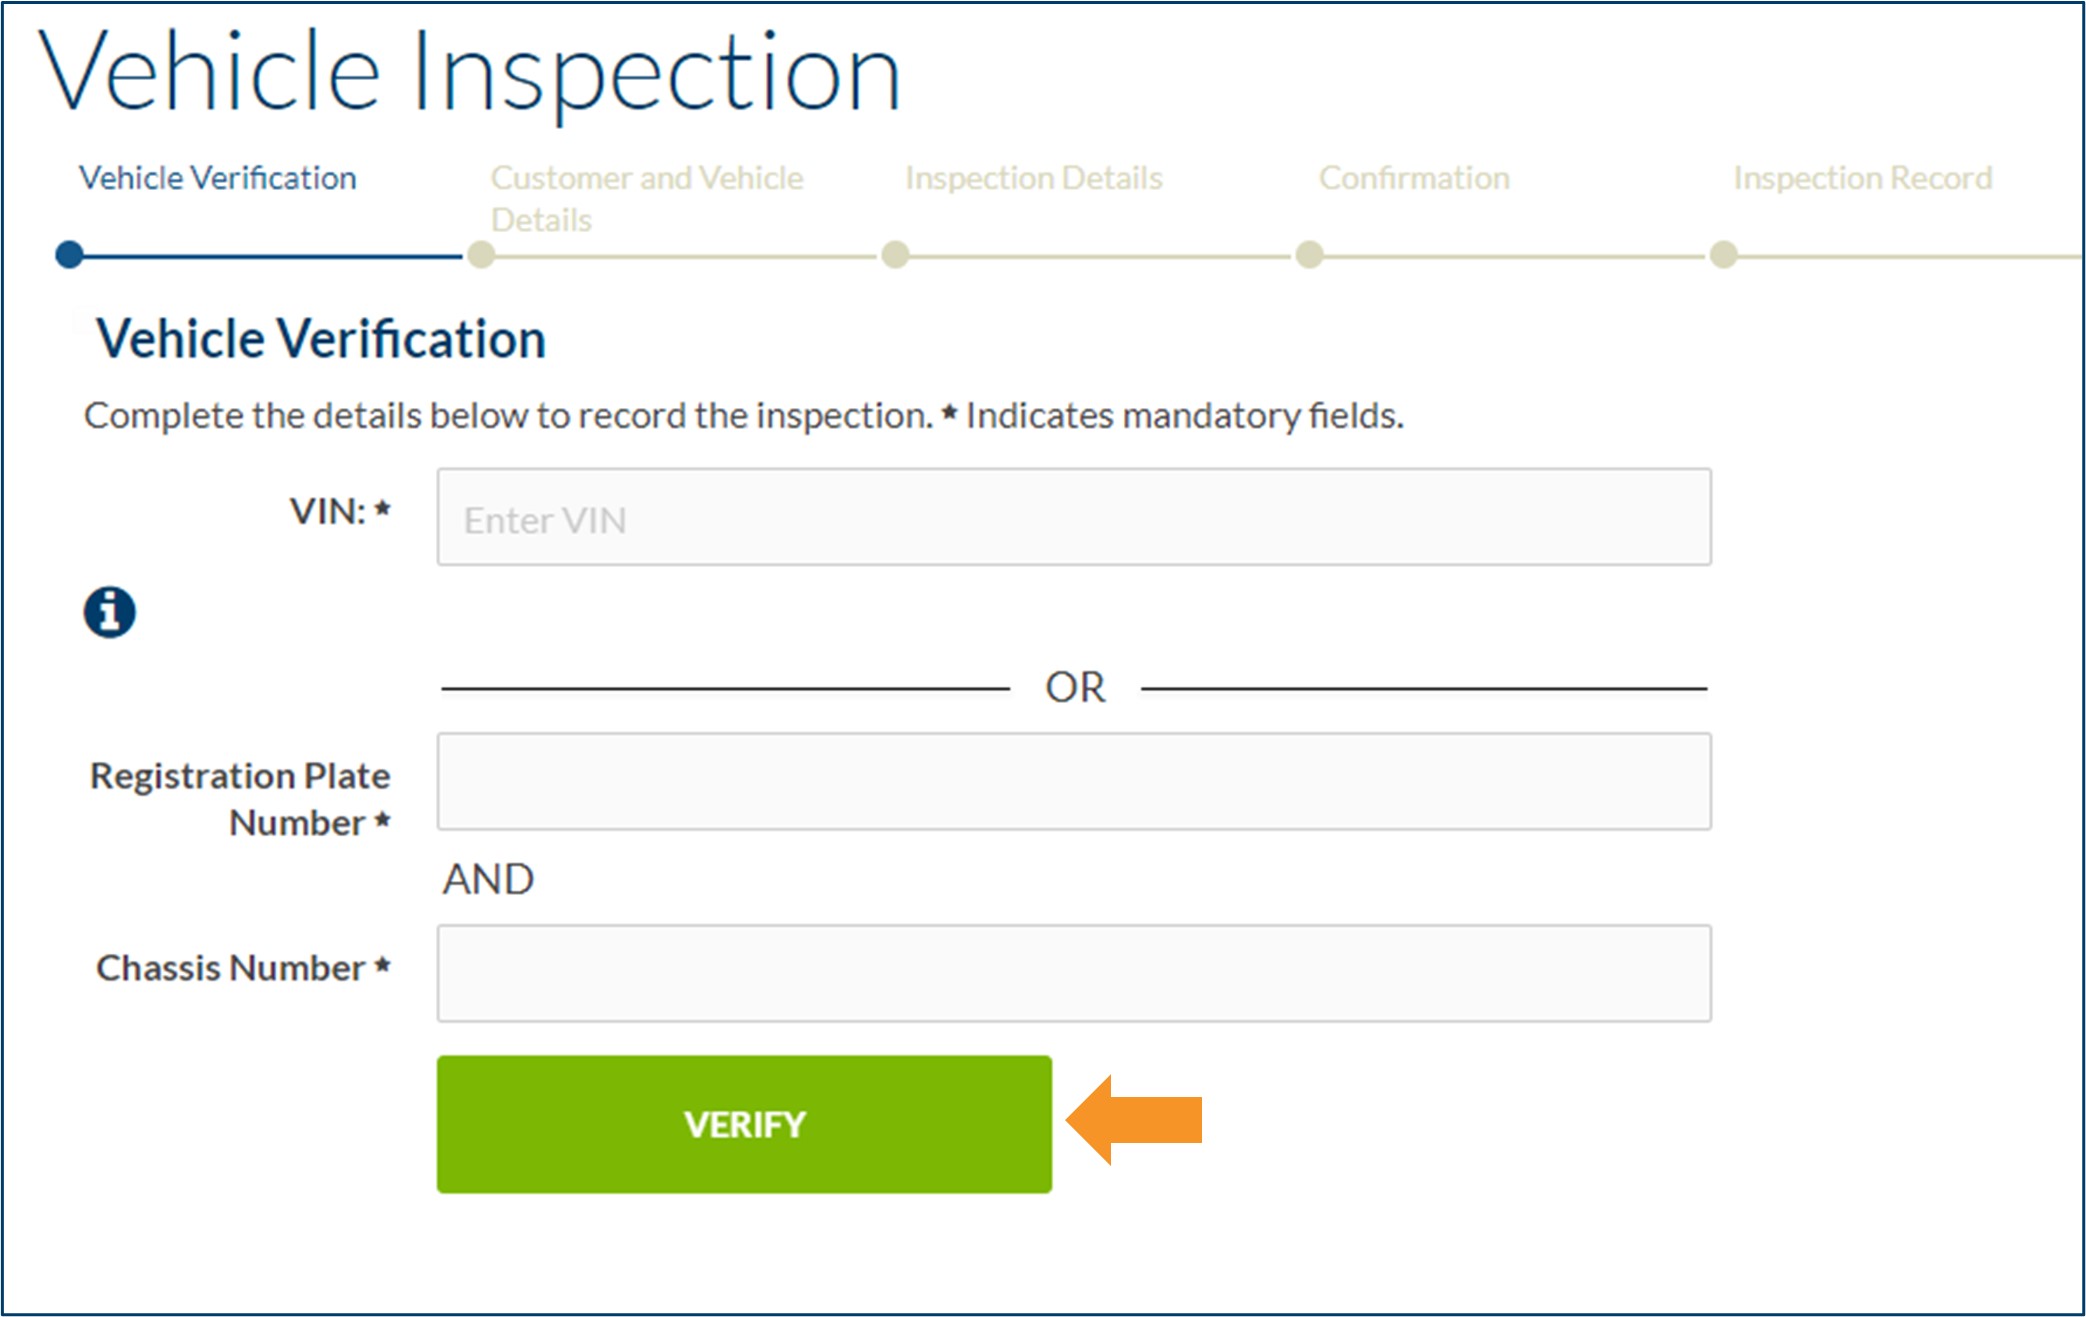
- Identify the vehicle or trailer:
- If the vehicle was manufactured after 1 January 1989, enter the Vehicle Identification Number (VIN).
- If the vehicle was manufactured before 1 January 1989, enter the Queensland registration plate number and chassis number.
- If the vehicle is unregistered, enter 'NOREGO' in the Registration Plate Number field and complete the Chassis Number field.
- After entering the required fields, click VERIFY.
- The vehicle will be verified against TMR's registration system.
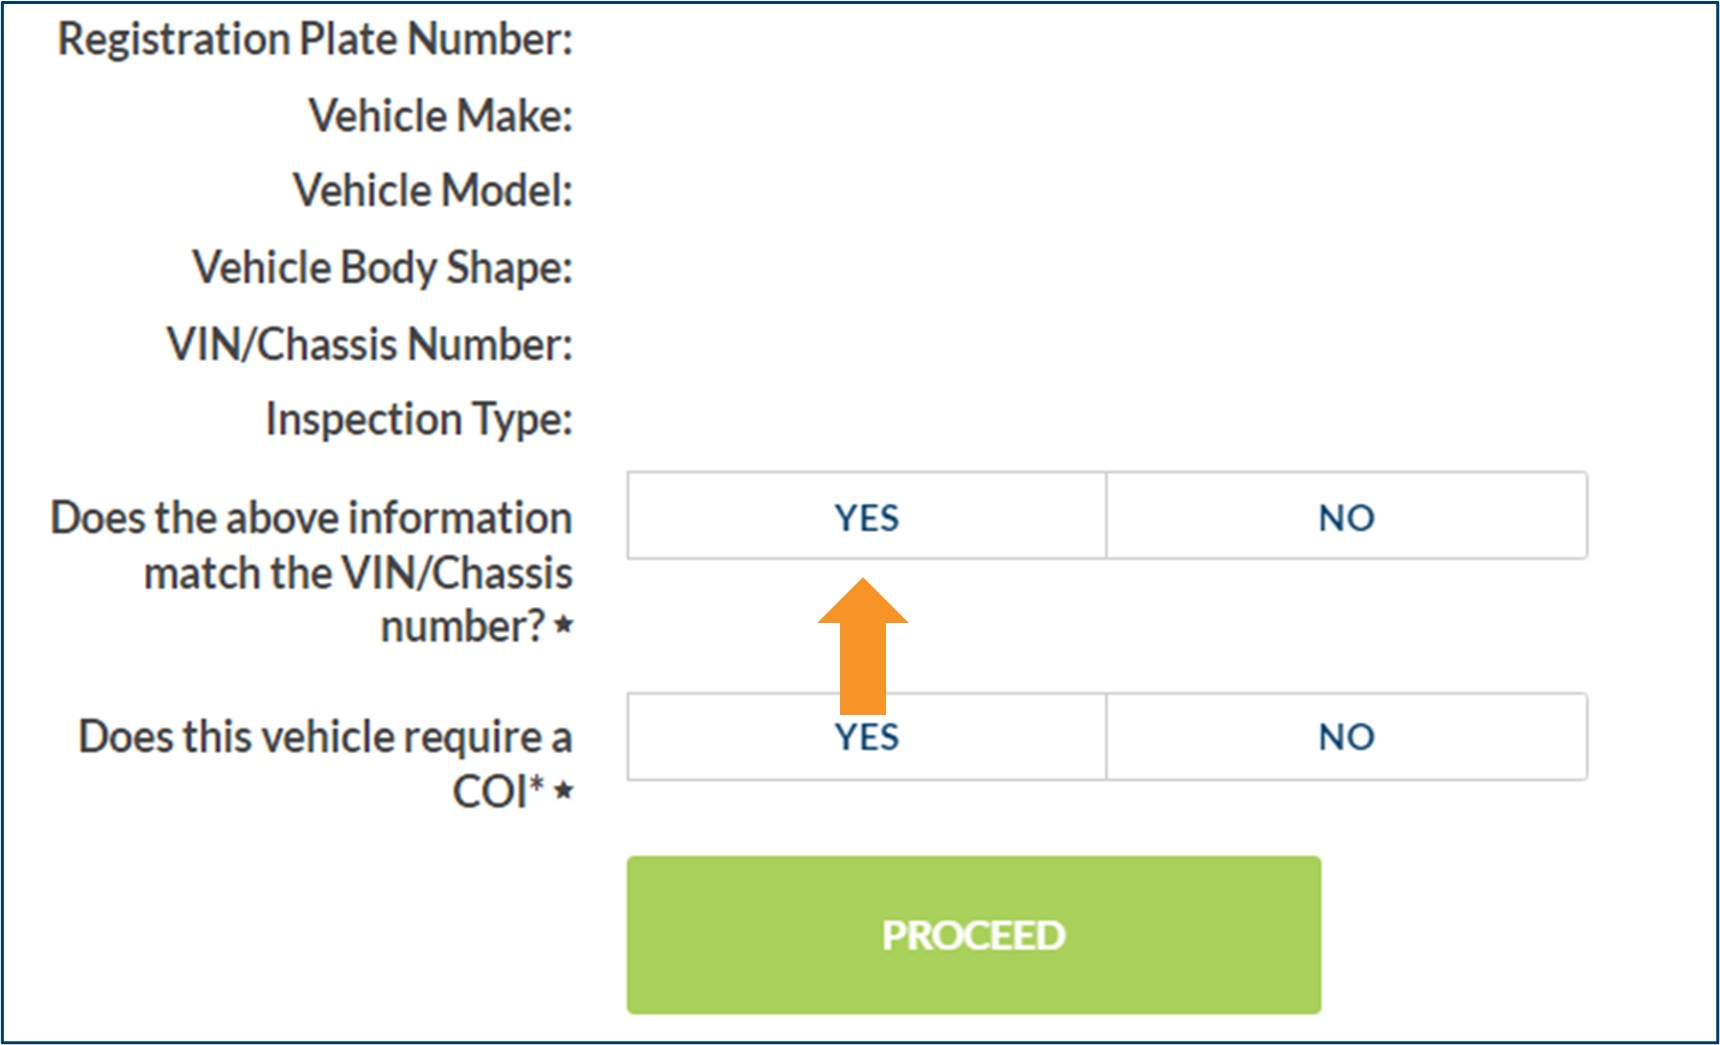
- The Registration Plate Number displayed in ICO does not need to match the Registration Plate Number of the vehicle you are inspecting. If all other details match, click YES.
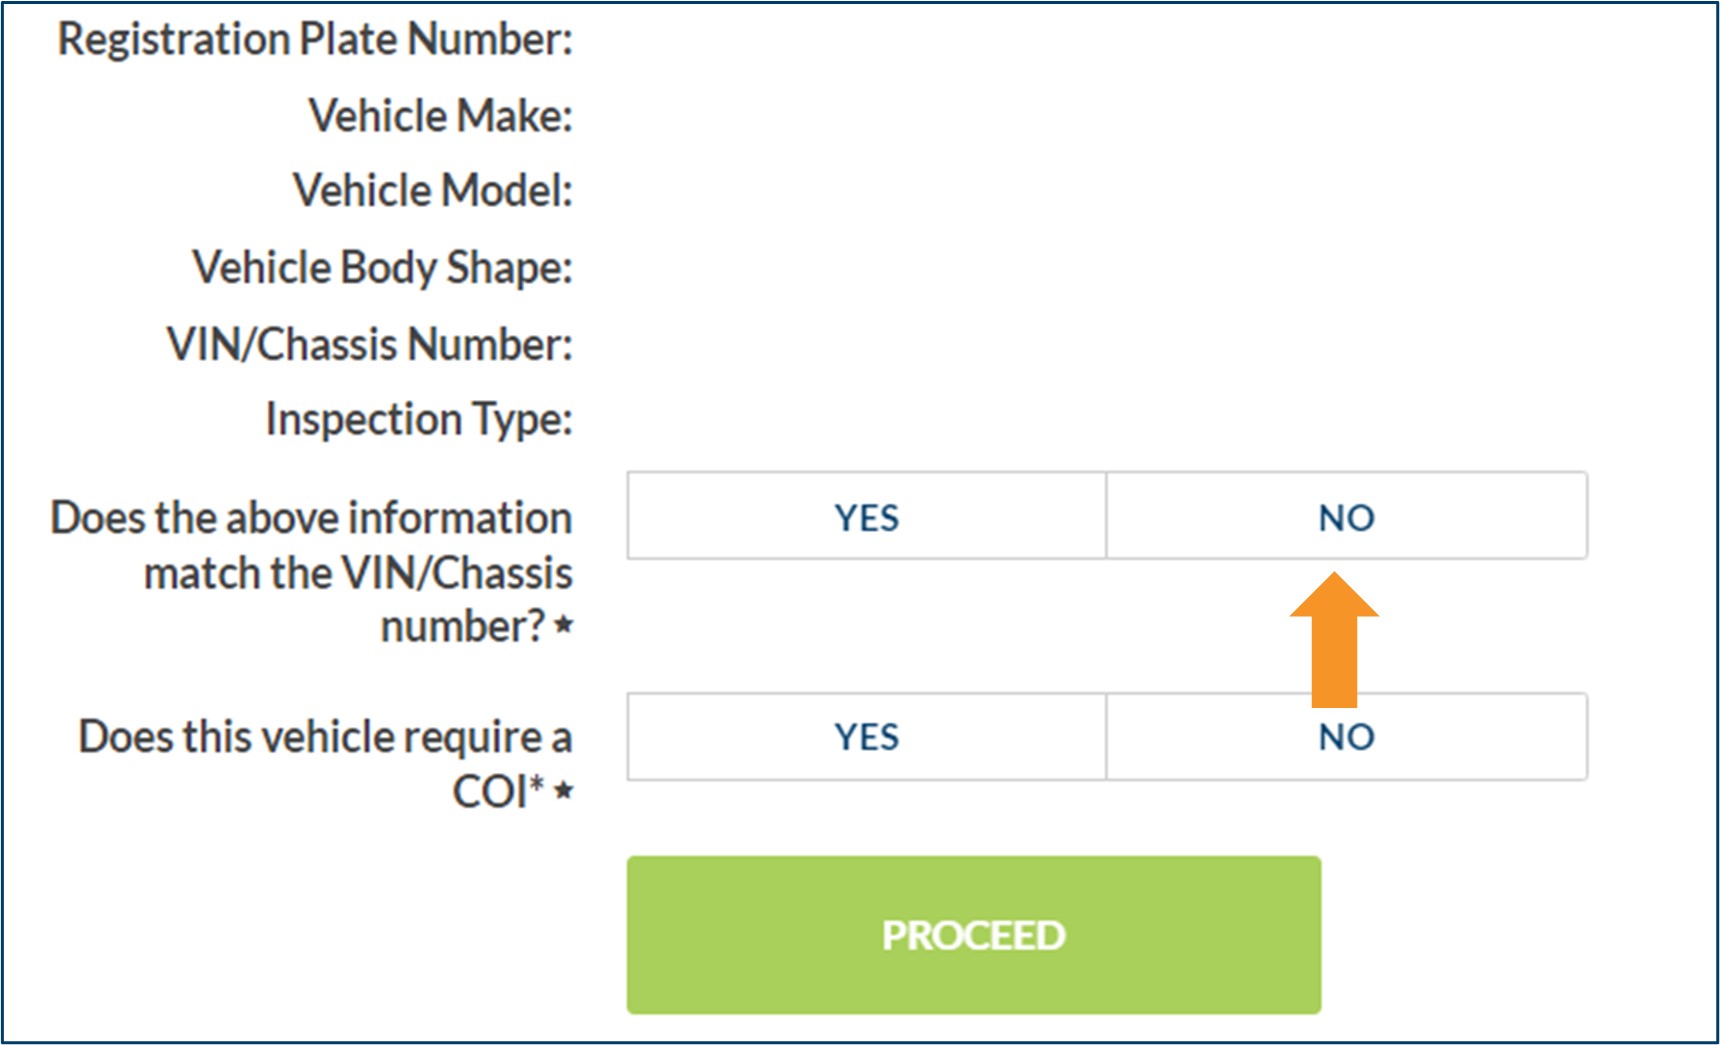
- If any of the vehicle details do not match (except the Registration Plate Number), click NO.
- The Registration Plate Number displayed in ICO does not need to match the Registration Plate Number of the vehicle you are inspecting. If all other details match, click YES.
- The inspection can still be recorded in ICO if the vehicle does not verify against TMR’s registration system by clicking MANUAL.

- This is called an unassigned inspection certificate and will not be automatically lodged in the TMR registration system.
- The customer will need to present a hard copy of the inspection certificate to a Customer Service Centre to register the vehicle or trailer.
- Unassigned inspection certificates start with the number 3 (e.g. LV-30000001-X).
- Click YES or NO for the requirement for a Certificate of Inspection (COI).
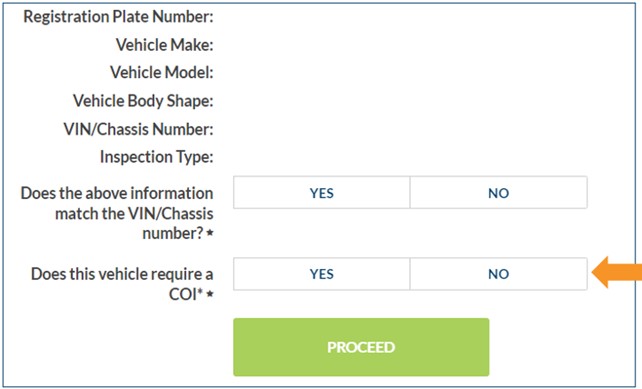
- This option only displays for light vehicles and motorcycles, as they can be issued with either a safety certificate or a COI.
- A COI may be required for a light vehicle or motorcycle being used to provide public passenger services, such as tourist vehicles, taxis, limousines and booked hire vehicles.
- The vehicle owner must let you know the type of inspection certificate they need.
- Once you have checked the vehicle details and determined the inspection type, click PROCEED.
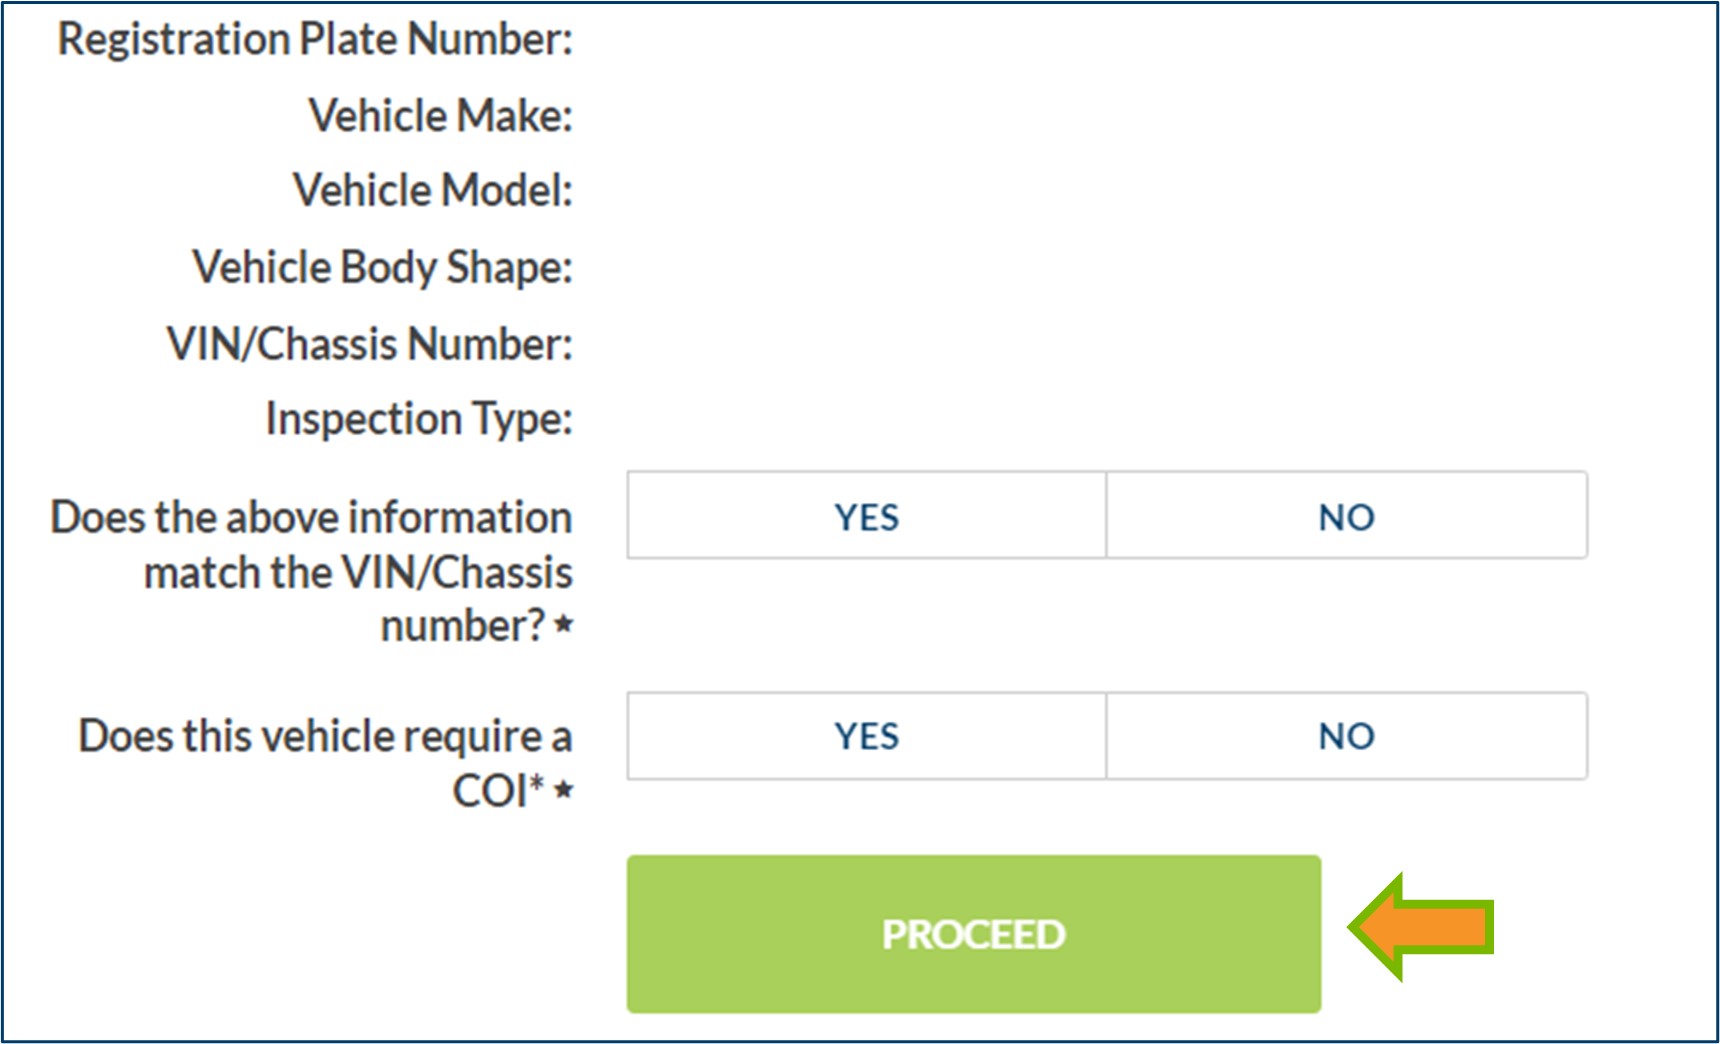
- You will be taken to the Customer and Vehicle Details.
- For an assigned inspection, some vehicle details will be prefilled. These details must be checked to ensure they accurately reflect the vehicle or trailer you are inspecting. Any incorrect information must be updated.
- For an unassigned inspection, all fields must be entered manually.
- Enter the customer email address (if provided).
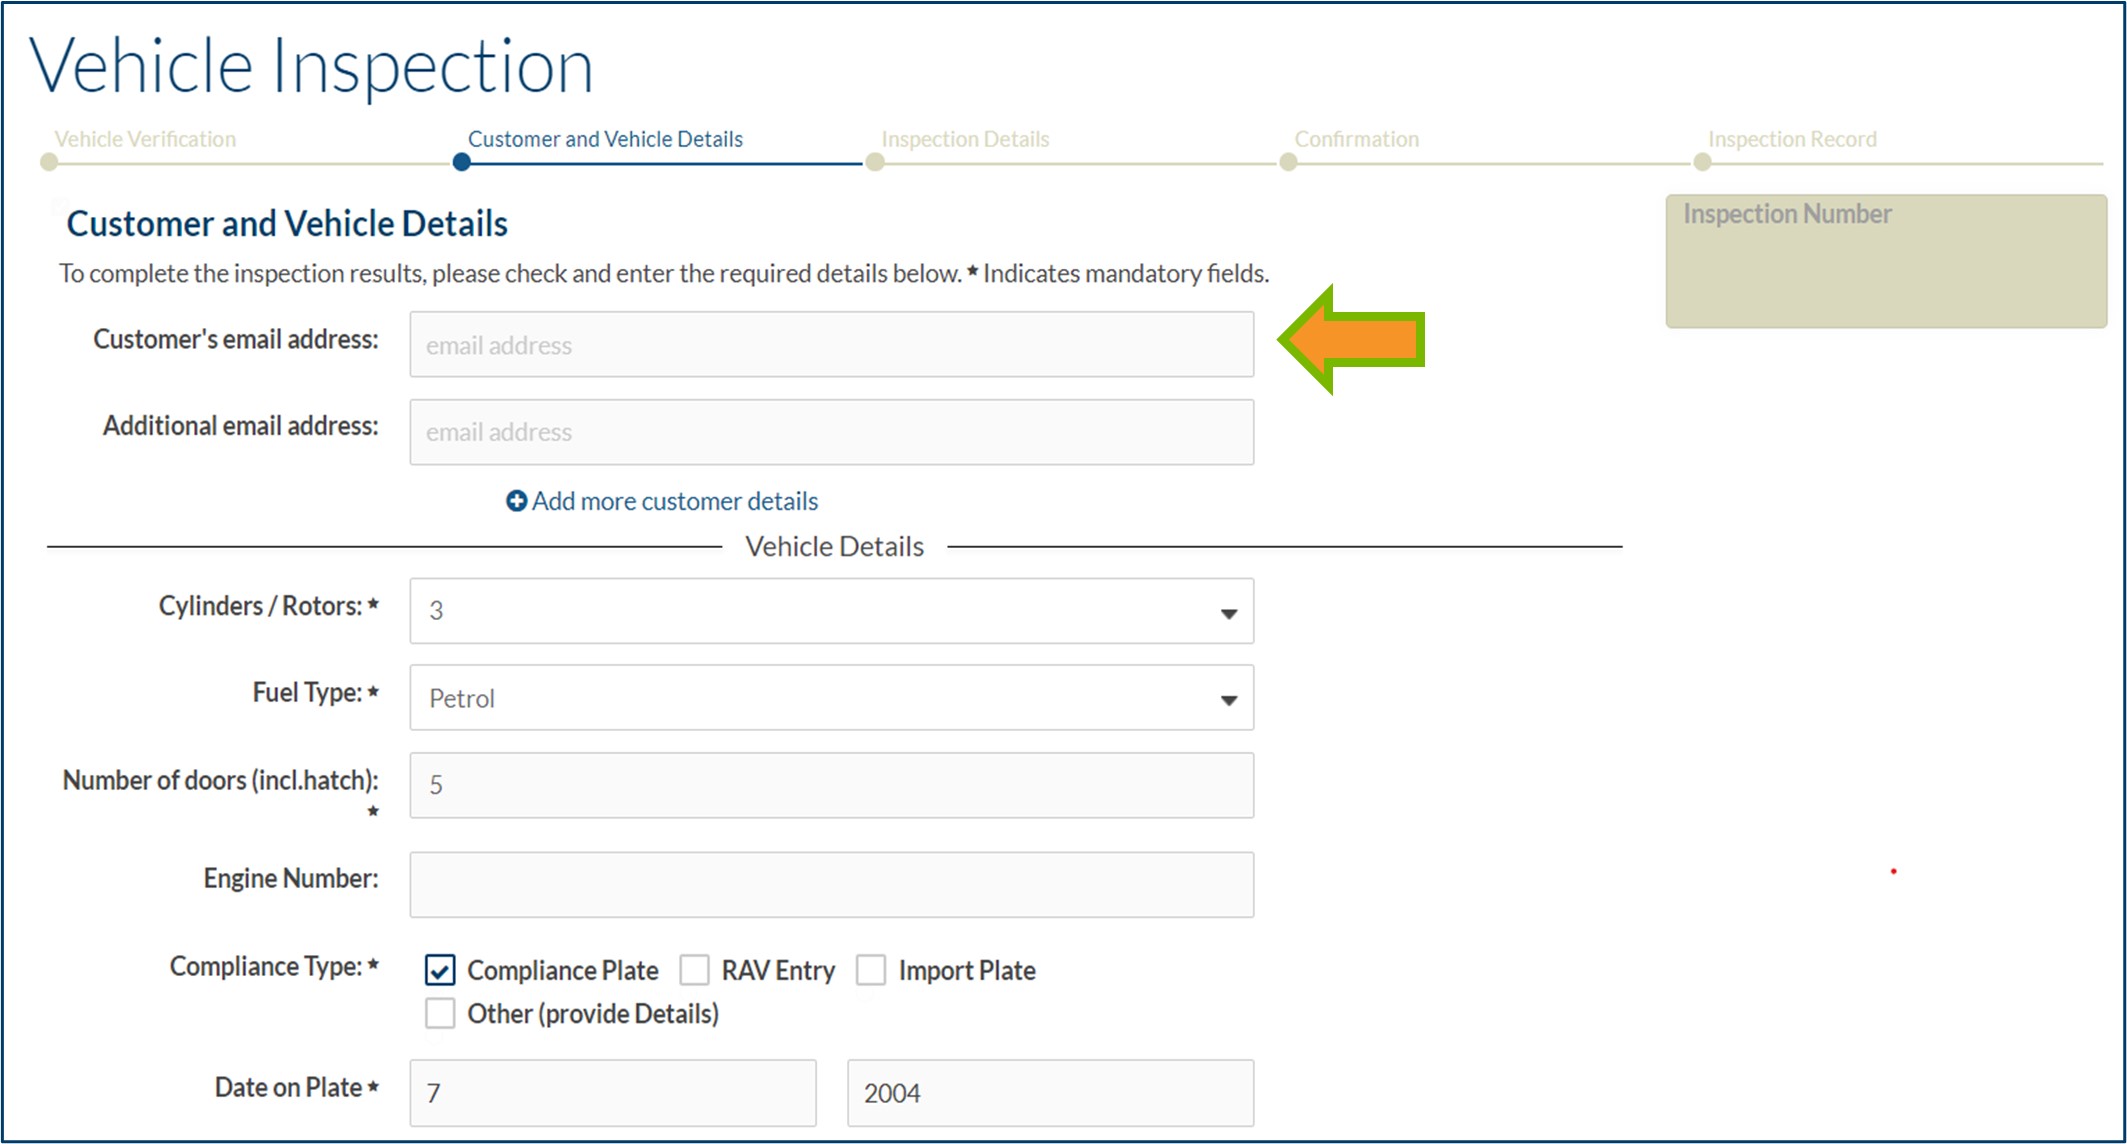
- This address is where the completed inspection certificate will automatically be sent when the inspection is approved.
- You do not need to print the inspection certificate unless the customer requests this.
- An additional email address can be added, if required.
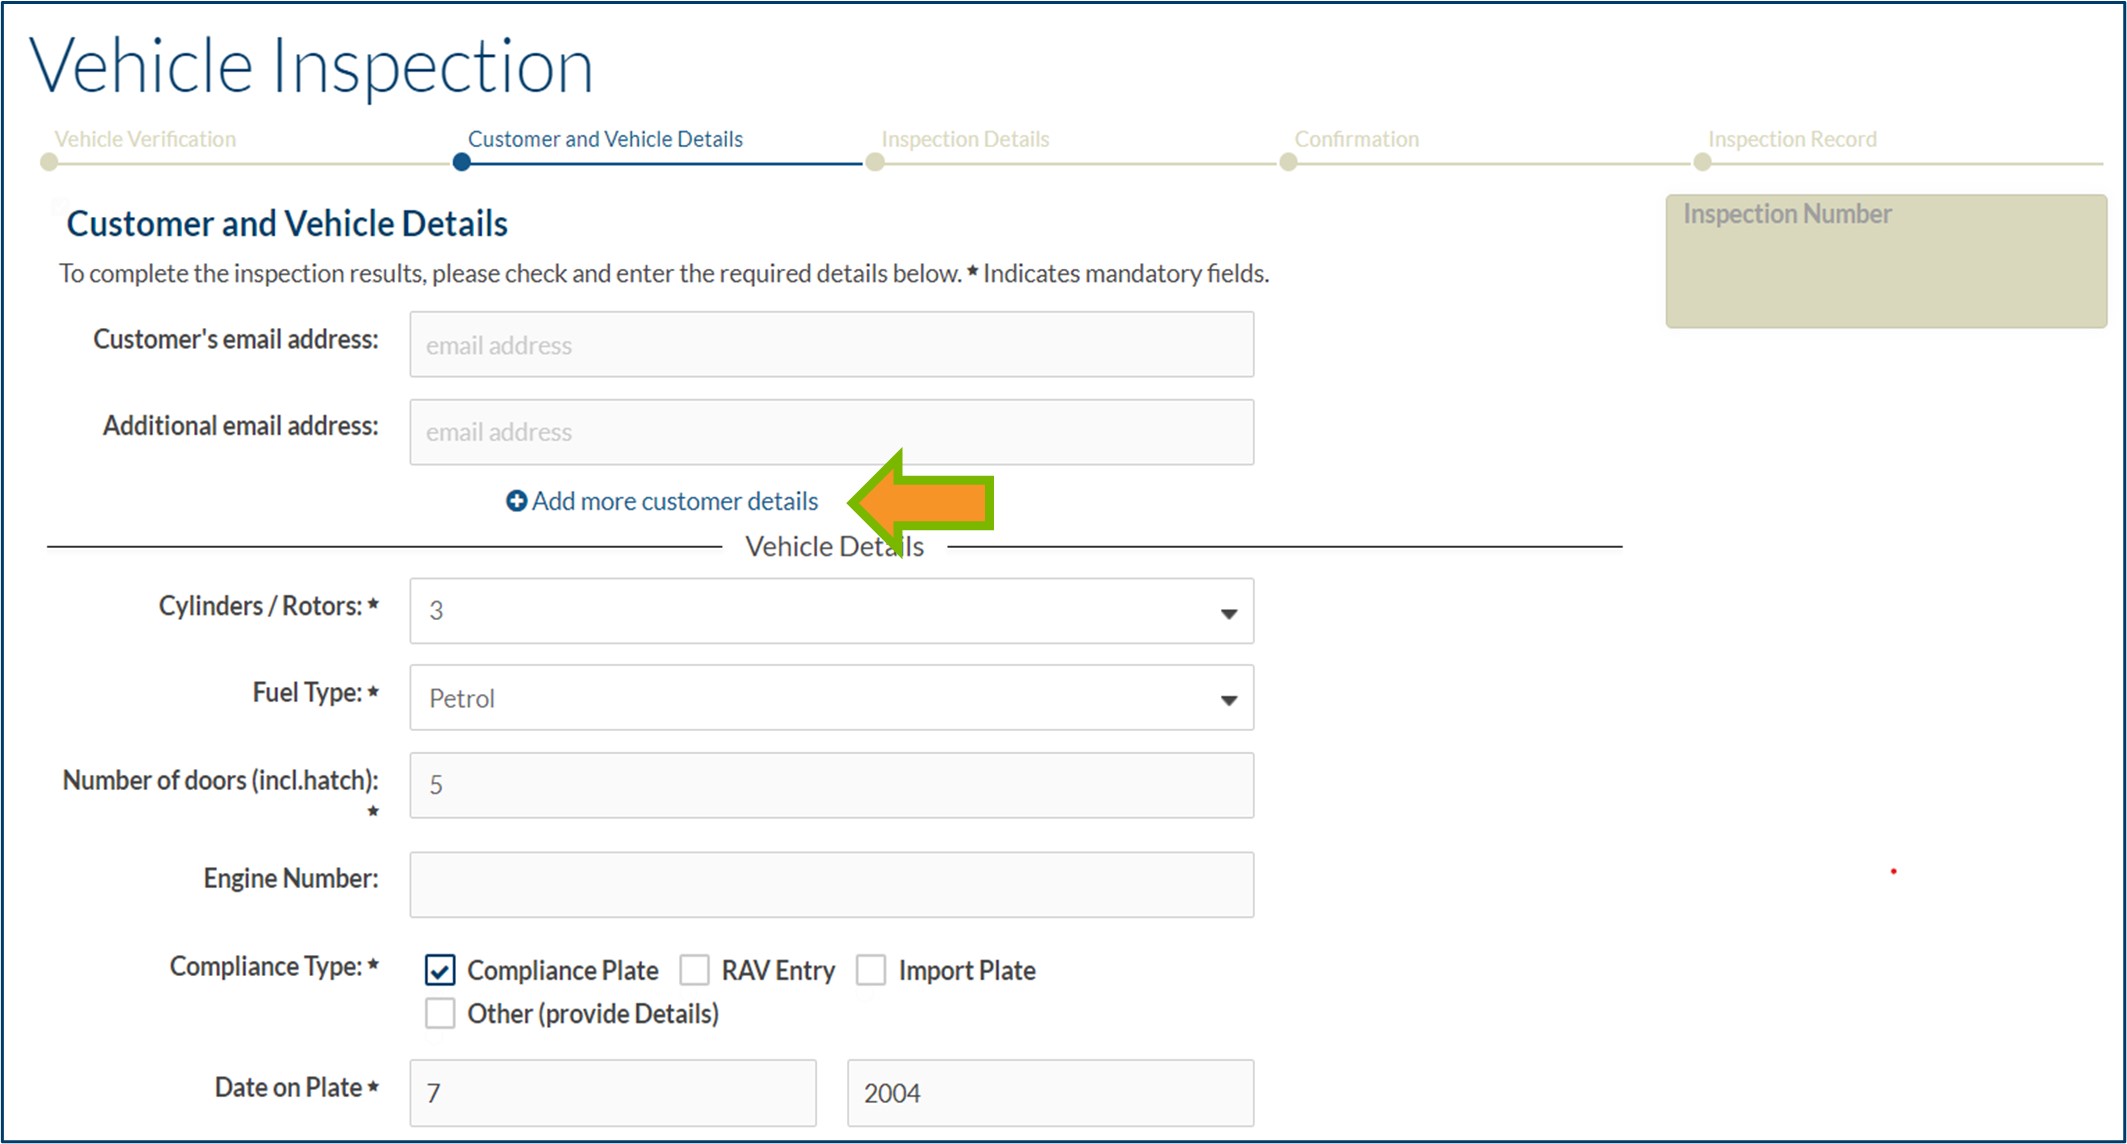
- Customer name and address can be entered by clicking Add more customer details. The customer’s details do not print on the inspection certificate/inspection report, but they will be saved in ICO as part of the inspection record.
- For Compliance Type, check the the box for the correct option.
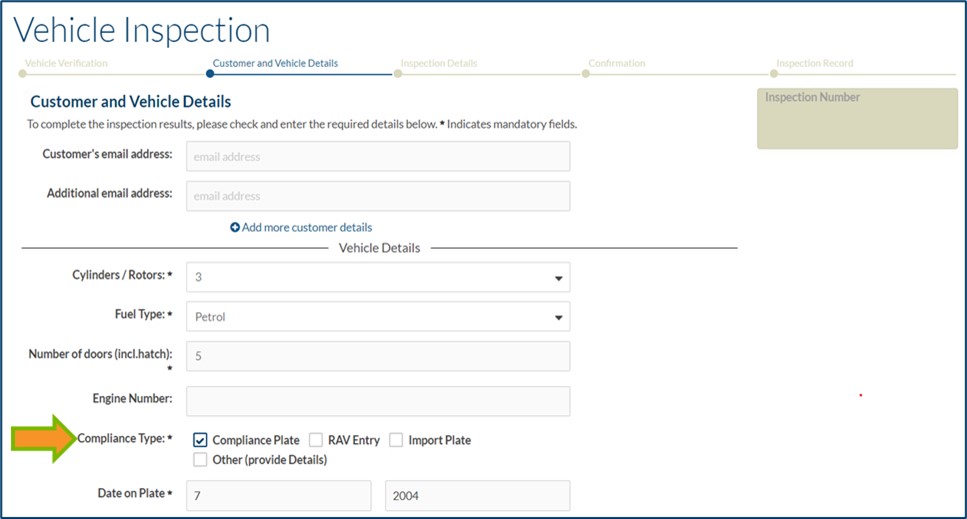
- If the vehicle has a compliance plate, choose Compliance Plate.
- If the vehicle was manufactured after 1 July 2021 and does not have a compliance plate, choose RAV Entry.
- If the vehicle has an import plate, choose Import Plate.
- If the vehicle has been identified using another method, choose Other and a Give Details field will appear for you to enter the information.
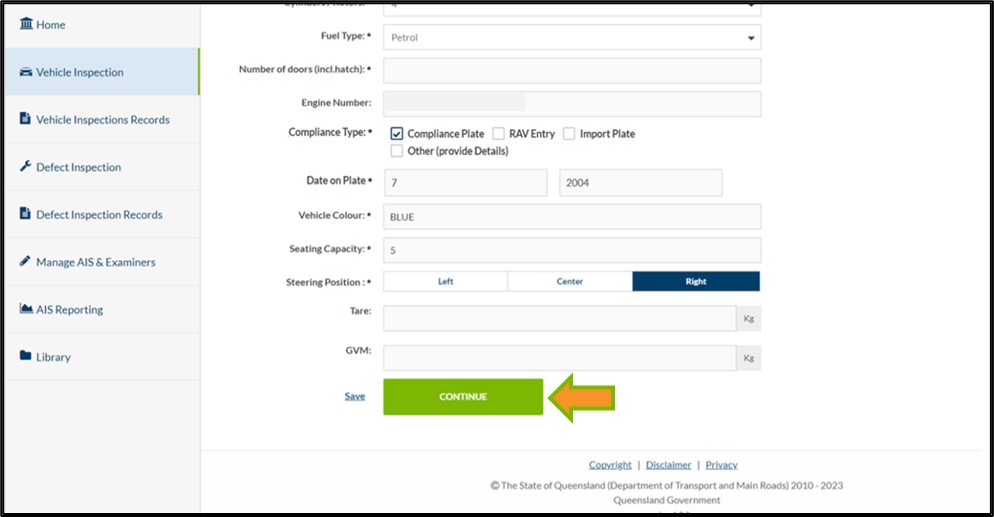
- Once you have completed all mandatory fields (*) click CONTINUE to proceed to the Inspection Details screen.
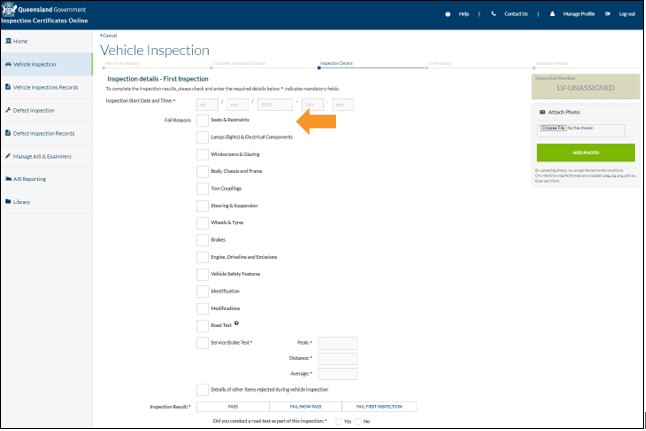
- Complete the Inspection Details screen:

- Enter the date and time you started the physical inspection of the vehicle.
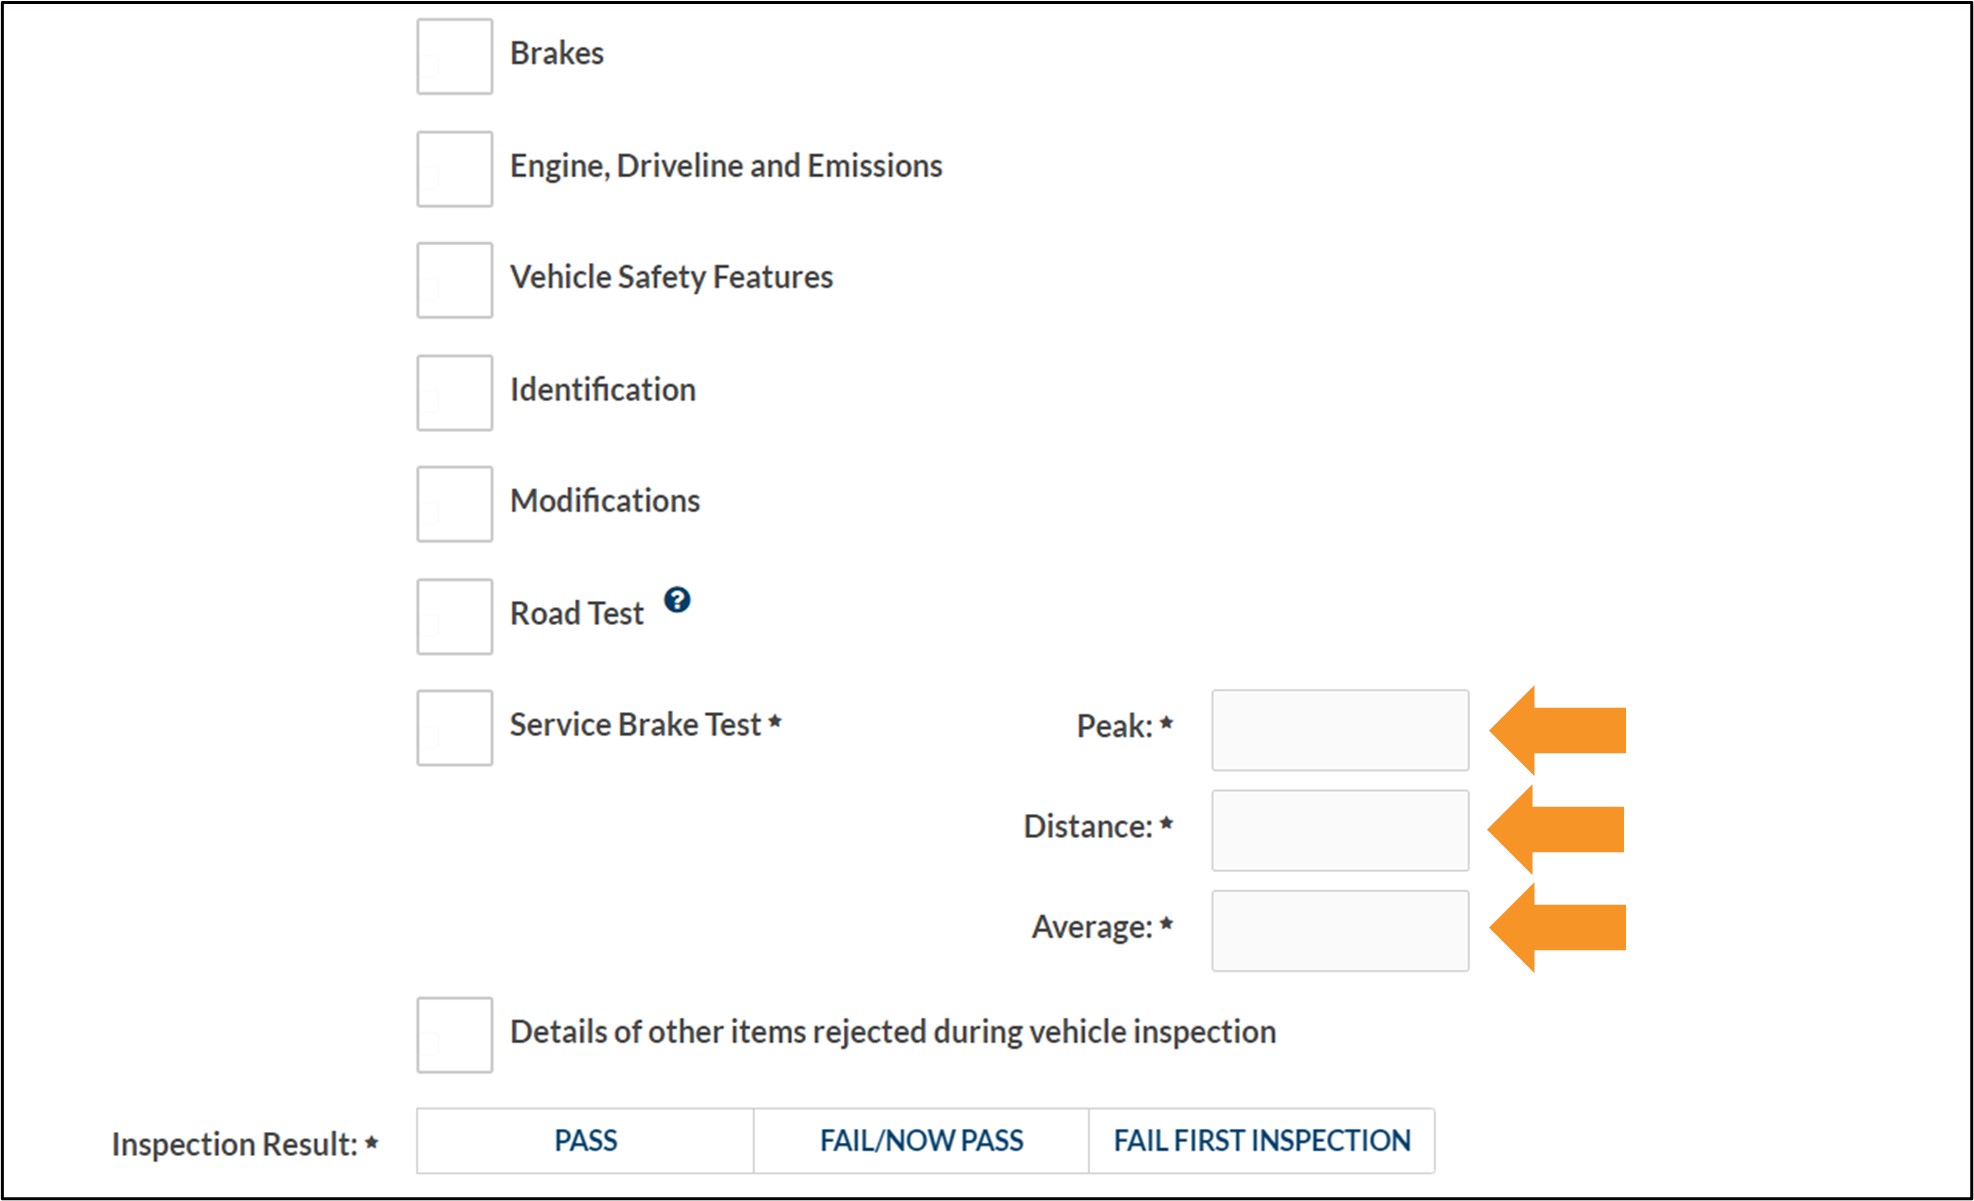
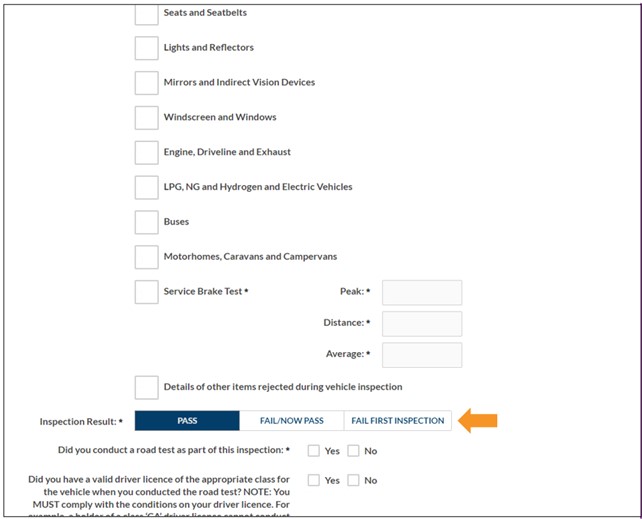
- Check the box for all relevant Fail Reasons identified during the vehicle inspection. All fail reasons from the vehicle inspection manuals are included in ICO.
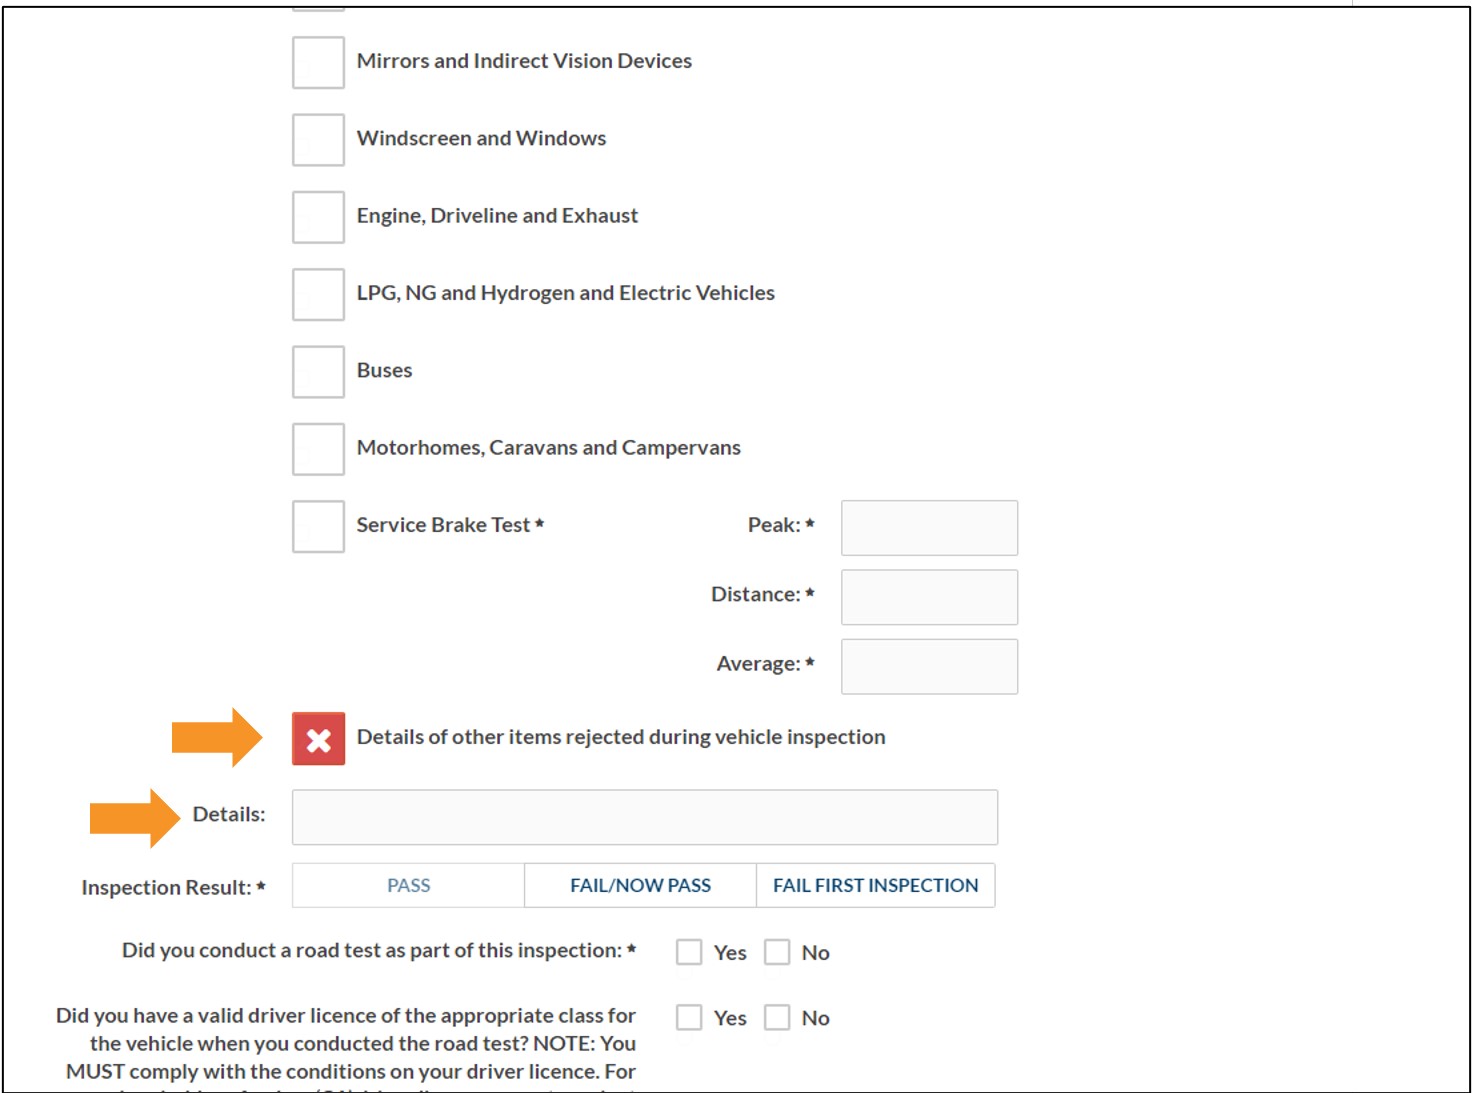
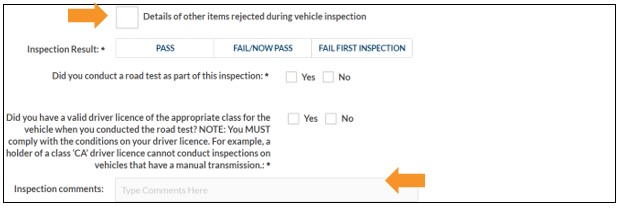
- If any other items were rejected, click Details of other items rejected during vehicle inspection and a text box will appear for you to add additional information.
- Any comments about the condition of the vehicle and any other reasons for rejection can be added in the Inspection Comments.
- Brake test results must be recorded for a passed inspection.
- A photo of the brake test results must be uploaded for a light vehicle, motorcycle or heavy vehicle inspection. If you are conducting an inspection from a mobile AIS, the GPS location must be included in the brake test results. If the vehicle fails the inspection and it was unsafe to conduct a brake test, a photo of the defect/s that resulted in the failed inspection should be uploaded instead of the brake test result.
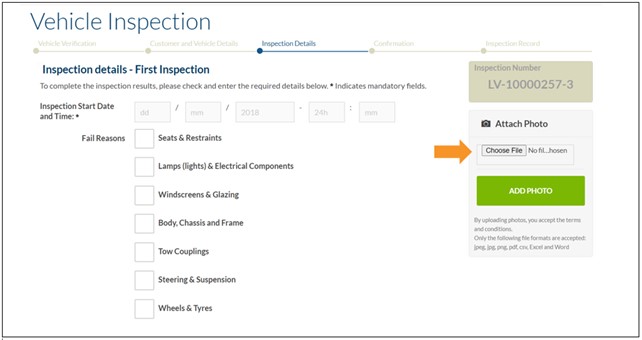
- To upload a photo of the brake test, click Choose File in the Attach Photo box.
- Find and select the photo you want upload and click ADD PHOTO to attach.
- Files must be uploaded one at a time.
- Maximum file size is 10MB.
- Accepted file types are jpeg, jpg, png, pdf, xlsx, csv, doc and docx.
- You will not be able to continue to the next screen without uploading at least one photo.
- To record the inspection result, you must select either PASS, FAIL/NOW PASS or FAIL FIRST INSPECTION.
- FAIL/NOW PASS can be used to record items that failed the inspection and the customer has agreed for those items to be fixed as part of the inspection. Select the fail reasons for the items that were identified and if they are fixed during the first inspection, click FAIL/NOW PASS to issue the inspection certificate. The failed items that are now fixed will be shown on the inspection certificate for the customer’s information.
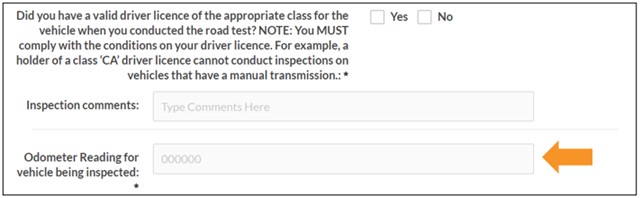
- If the inspection type is LV, CL, MC, CM, or HV, you must declare if you conducted a road test as part of the inspection and if you held the appropriate class of driver licence at the time of the road test.
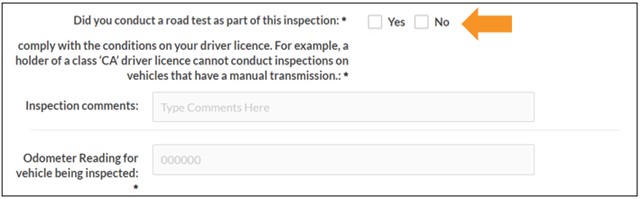
- The odometer reading must be entered for both pass and fail inspections. The odometer reading is not applicable to trailers.
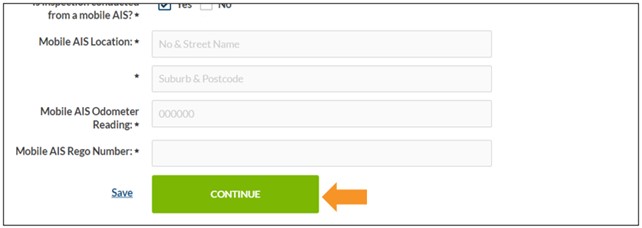
- If you are an approved mobile AIS and if you select Yes to the question Is inspection conducted from a mobile AIS?, then additional fields will appear and you will need to enter.
- Mobile AIS Location (enter the street number, street name and suburb where the inspection took place).
- Mobile AIS Odometer Reading.
- Mobile AIS Rego Number.
- Once all details are completed, click CONTINUE to proceed to the confirmation screen.
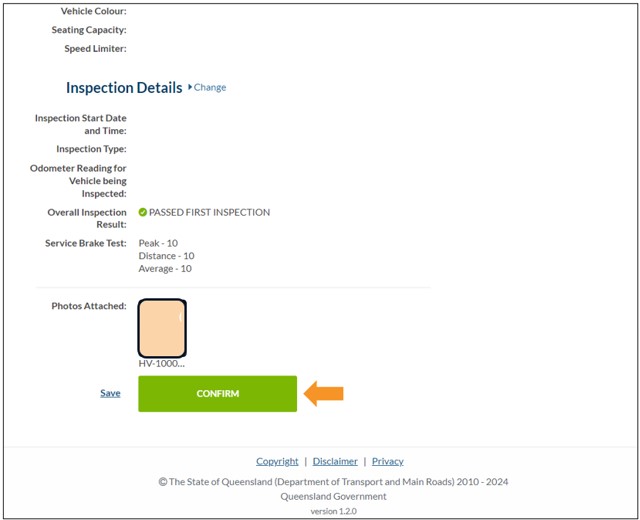
- Confirm that all customer, vehicle and inspection details are entered correctly.
- If any details are incorrect, click Change to return to the relevant screen to allow you to amend the information. Once the required changes are made, click through the inspection to the confirmation screen.
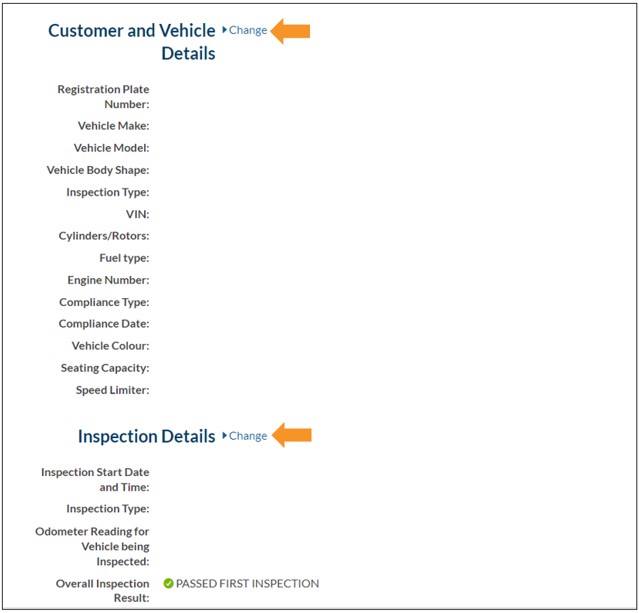
- If all details are correct, click CONFIRM.
Important: Once you click CONFIRM, the inspection record cannot be changed.
- If any details are incorrect, click Change to return to the relevant screen to allow you to amend the information. Once the required changes are made, click through the inspection to the confirmation screen.
- If you are both an approval holder and an approved examiner in ICO, you can approve the inspection by clicking APPROVE NOW.
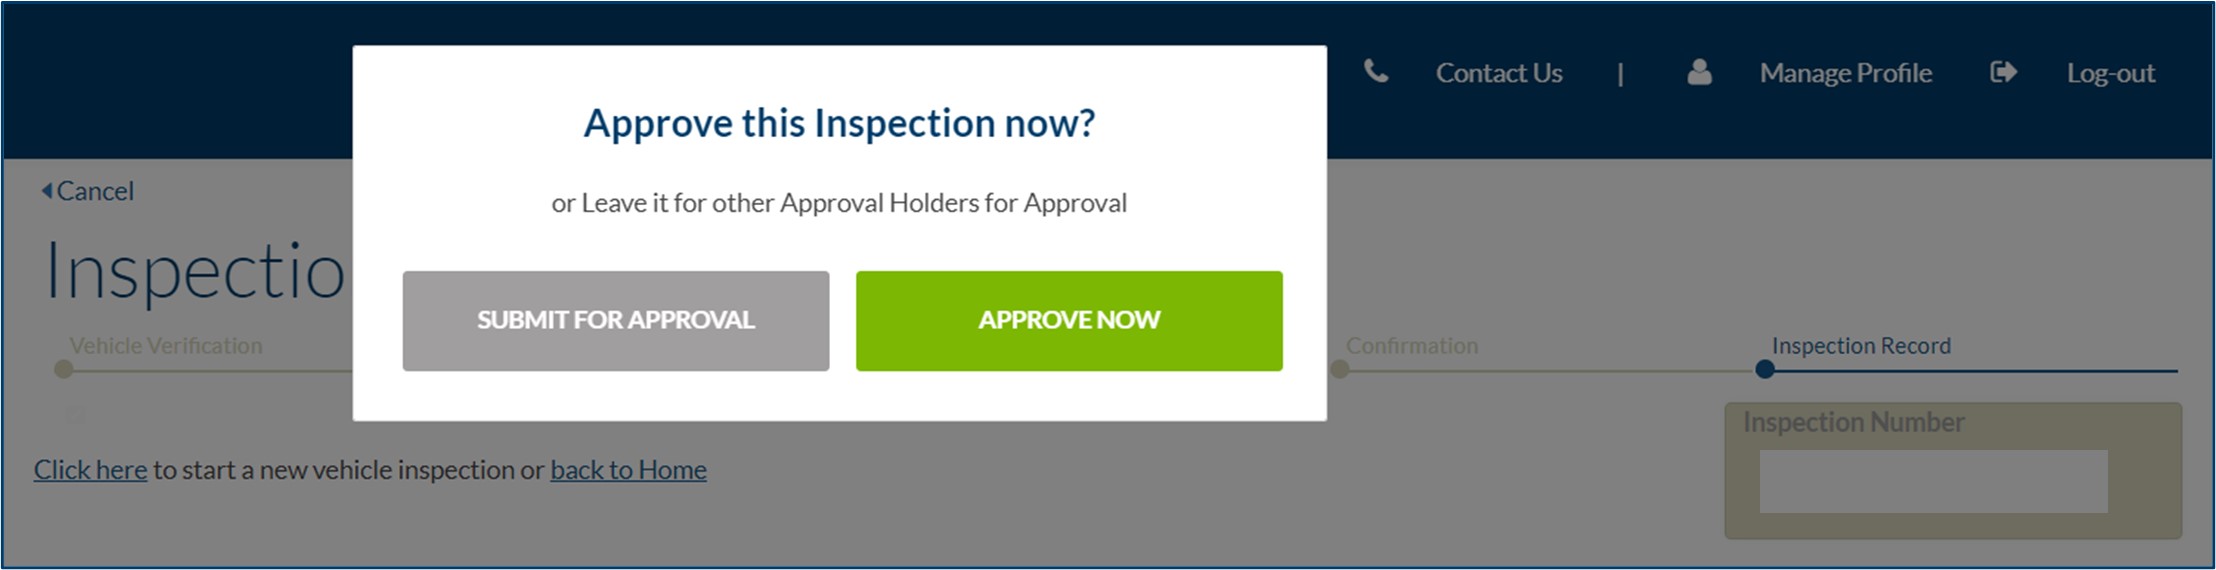
- If you are an approved examiner only, your completed inspection record will be submitted for approval to all approval holders at your AIS who are enrolled in ICO.
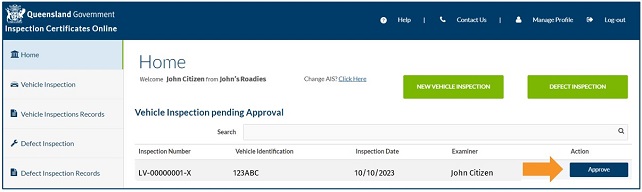
- Once the inspection certificate has been submitted for approval by the approved examiner, an approval holder at the AIS must log in to their ICO account to approve or reject it.
- The inspection will appear in the approval holder’s Home screen. To approve or reject an inspection, click APPROVE.
- The Inspection Details screen will appear with the information entered for the inspection. Click APPROVE or REJECT.
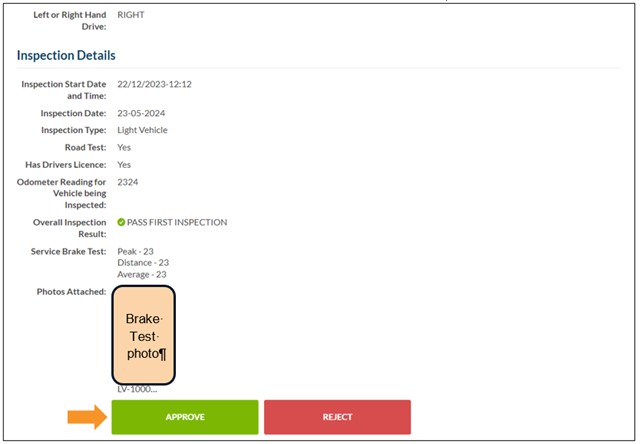
- APPROVE: If the inspection is approved by an approval holder, the inspection certificate will be generated and automatically emailed to the customer, if an email address was provided. A hard copy of the inspection certificate can also be printed and provided to the customer, if required.
- REJECT: If the inspection is rejected by the approval holder, it will appear in the approved examiner’s Home screen and they will receive an email advising them that the inspection has been rejected. The approved examiner will need to review the inspection and resubmit it for approval once the reason it was rejected has been addressed.
- If the inspection result is a fail, the inspection report doesn't need to be approved by an approval holder before being provided to the customer. When you click CONFIRM, the inspection report will be generated and automatically emailed to the customer, if an email address was provided. A hard copy of the inspection report can also be printed and provided to the customer, if required.

- Last updated
- 23 August 2024
Contact us
If you experience any issues, contact the help desk between 8:30am and 4:30pm, Monday to Friday.
| Email: | [email protected] |
|---|---|
| Phone: | 07 3066 2482 |
| Post: |
ICO Administrator Department of Transport and Main Roads PO Box 673 FORTITUDE VALLEY QLD 4006 |